Embedded bank data journeys
Seamless bank data capture within your site
This feature is designed to make it as easy as possible for you to gain consent from your customer for EDD and other bank data analysis.
Instead of sending links and codes, you can use this feature to embed the bank journey directly into your secure account or cashier pages, allowing your customer to agree to share bank data without leaving your site (except for the bank process itself, which must happen in a separate tab or window as dictated by the bank security protocols). This is more convenient for the customer and easier for you.
Webhooks can also be configured to alert you whenever a connection has been made.
You can configure these journeys to enable customers to upload documents such as wage slips, tax returns or original bank statements. Just set it up in the configuration.
Set up your journey
Log in to the DoTrust console. You will need sufficient permissions to create and edit hosted journeys. If in doubt, contact an administrator.
Go to Service Admin > Journeys and create the Journey in the interface. Set your theme so that it blends in to the target page. Your logo and the Header will not be displayed.

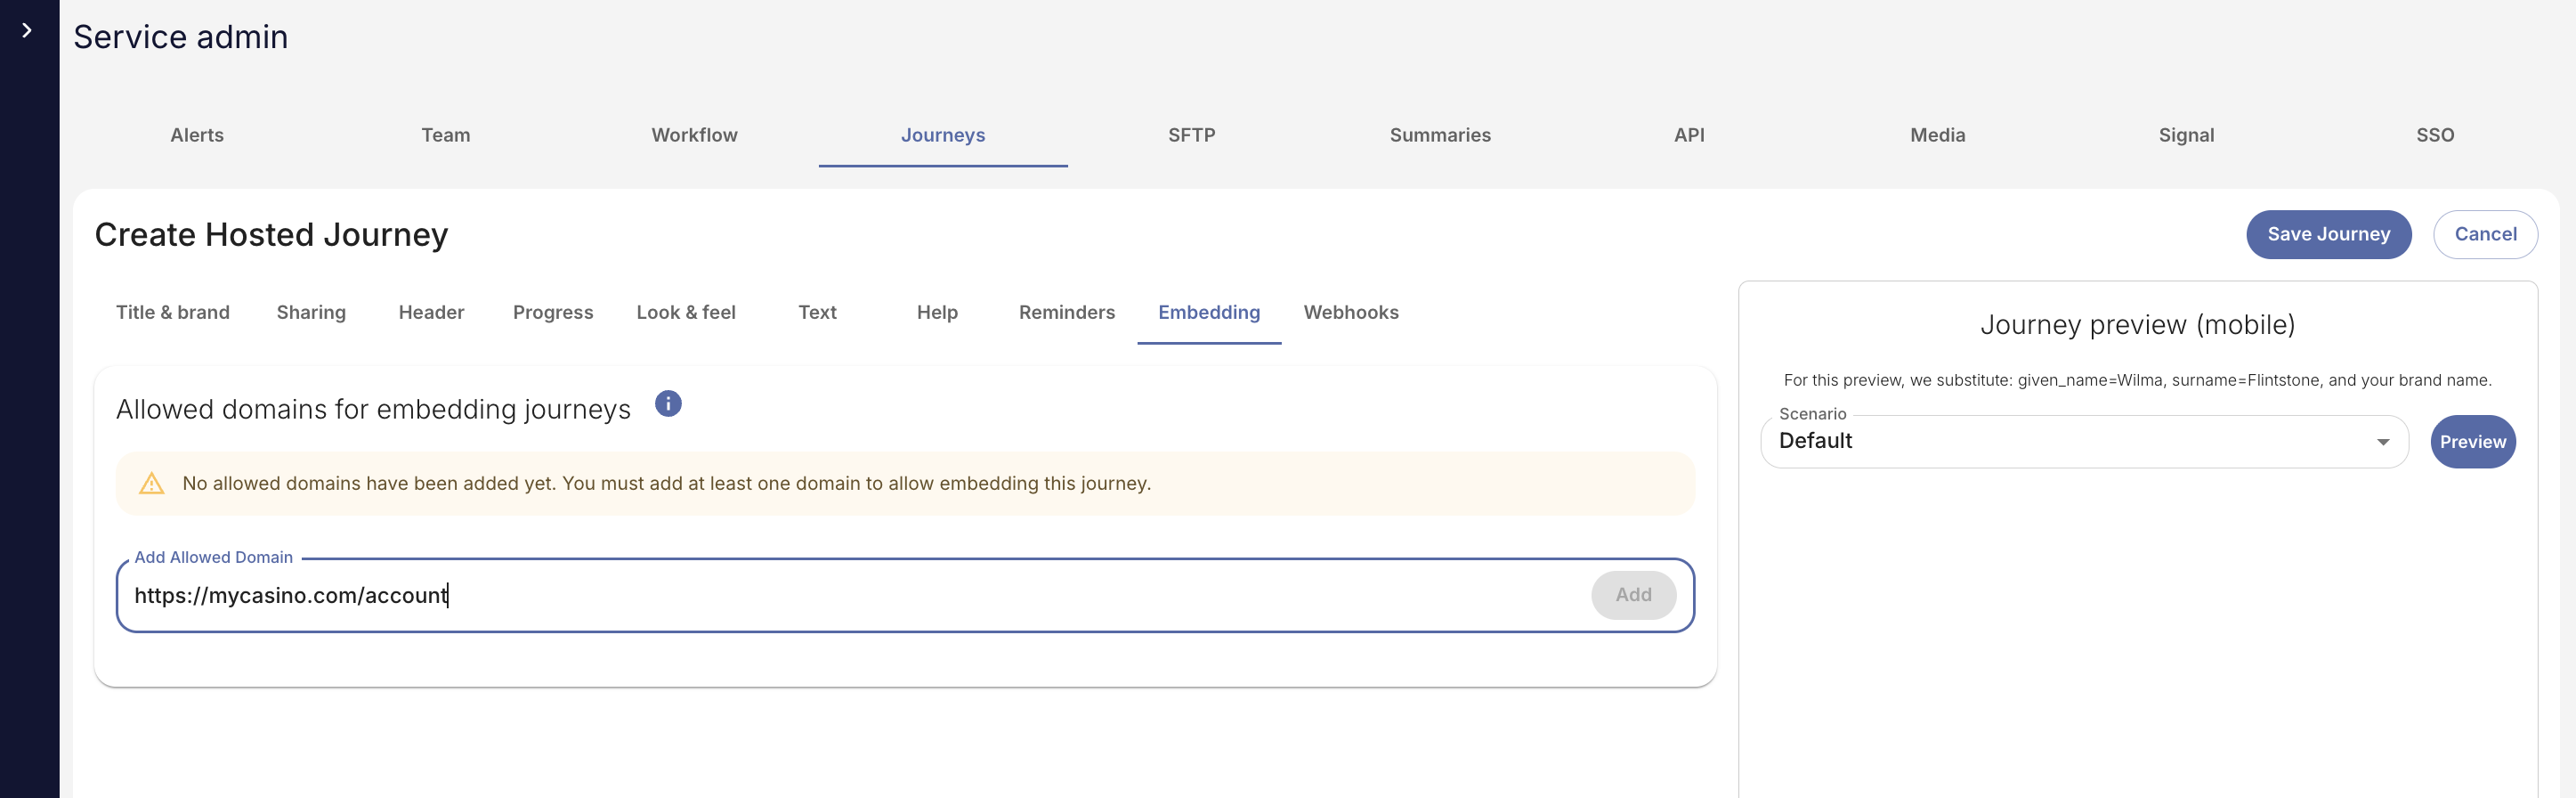
In the Embedding tab, specify the URL where the interface will be hosted. This is a security requirement.
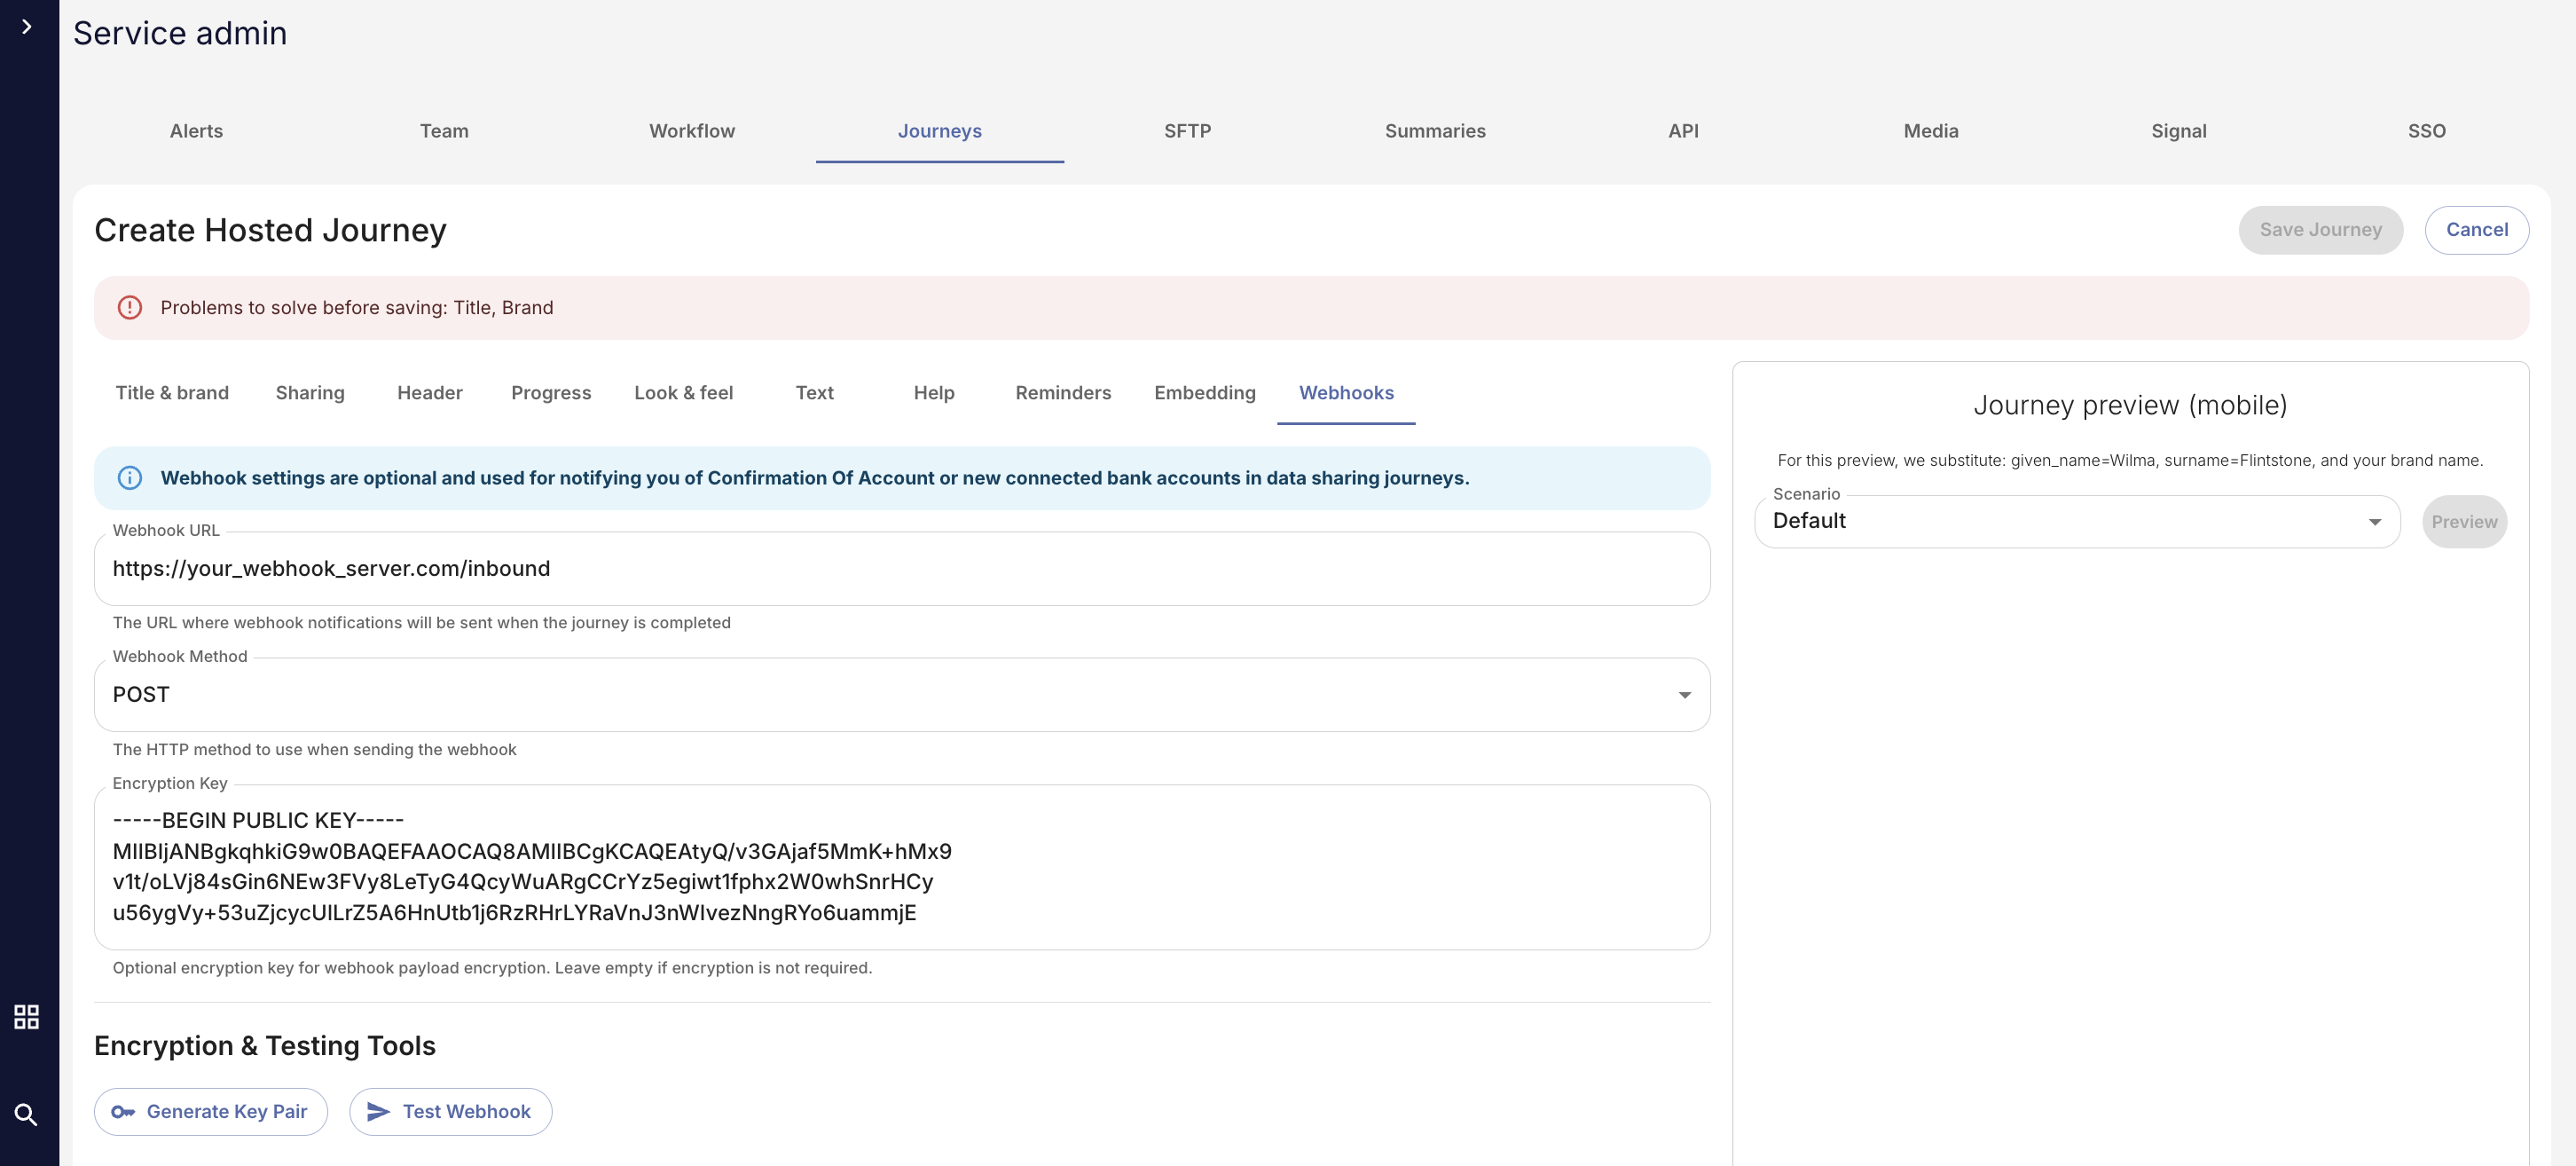
If you want webhook notifications, you can set these up in the Webhooks tab:
If enabled, you will receive a message every time a customer successfully connects a bank account. After a few minutes the data and analysis will be available in the console for review.
The webhook message looks like this:
{
  "event": "account_connected",
  "accounts": 2,
  "customer_id": "E1234567890",
  "journey_key": "0b3a5297-2ecd-49e8-bfef-25f6b6804a26",
  "date": "2025-10-20T14:56:45.223Z",
  "url": "https://console.dotrust.co.uk/consumer/xxxxxxxx",
  "journey_name": "Test 1"
}-
Event can be ‘account_connected’ or ‘abandoned_consent’. The latter is used when the customer gets into their bank account but for some reason decides not to proceed.
-
Accounts is the number of bank accounts connected for this customer after this session.
-
Customer ID is your UUID for the customer.
-
Journey Key is the UUID of the journey which we provide.
-
Journey name is the title of the journey which you provide in the configuration tool
-
URL is a link through to the console for looking at the customer. This requires login by your agent in order to gain access.
Using Webhook encryption (recommended)
Embedding the journey in your site
To embed the journey itself, add the script tag to the bottom of your web page immediately before the closing body tag.
<script
defer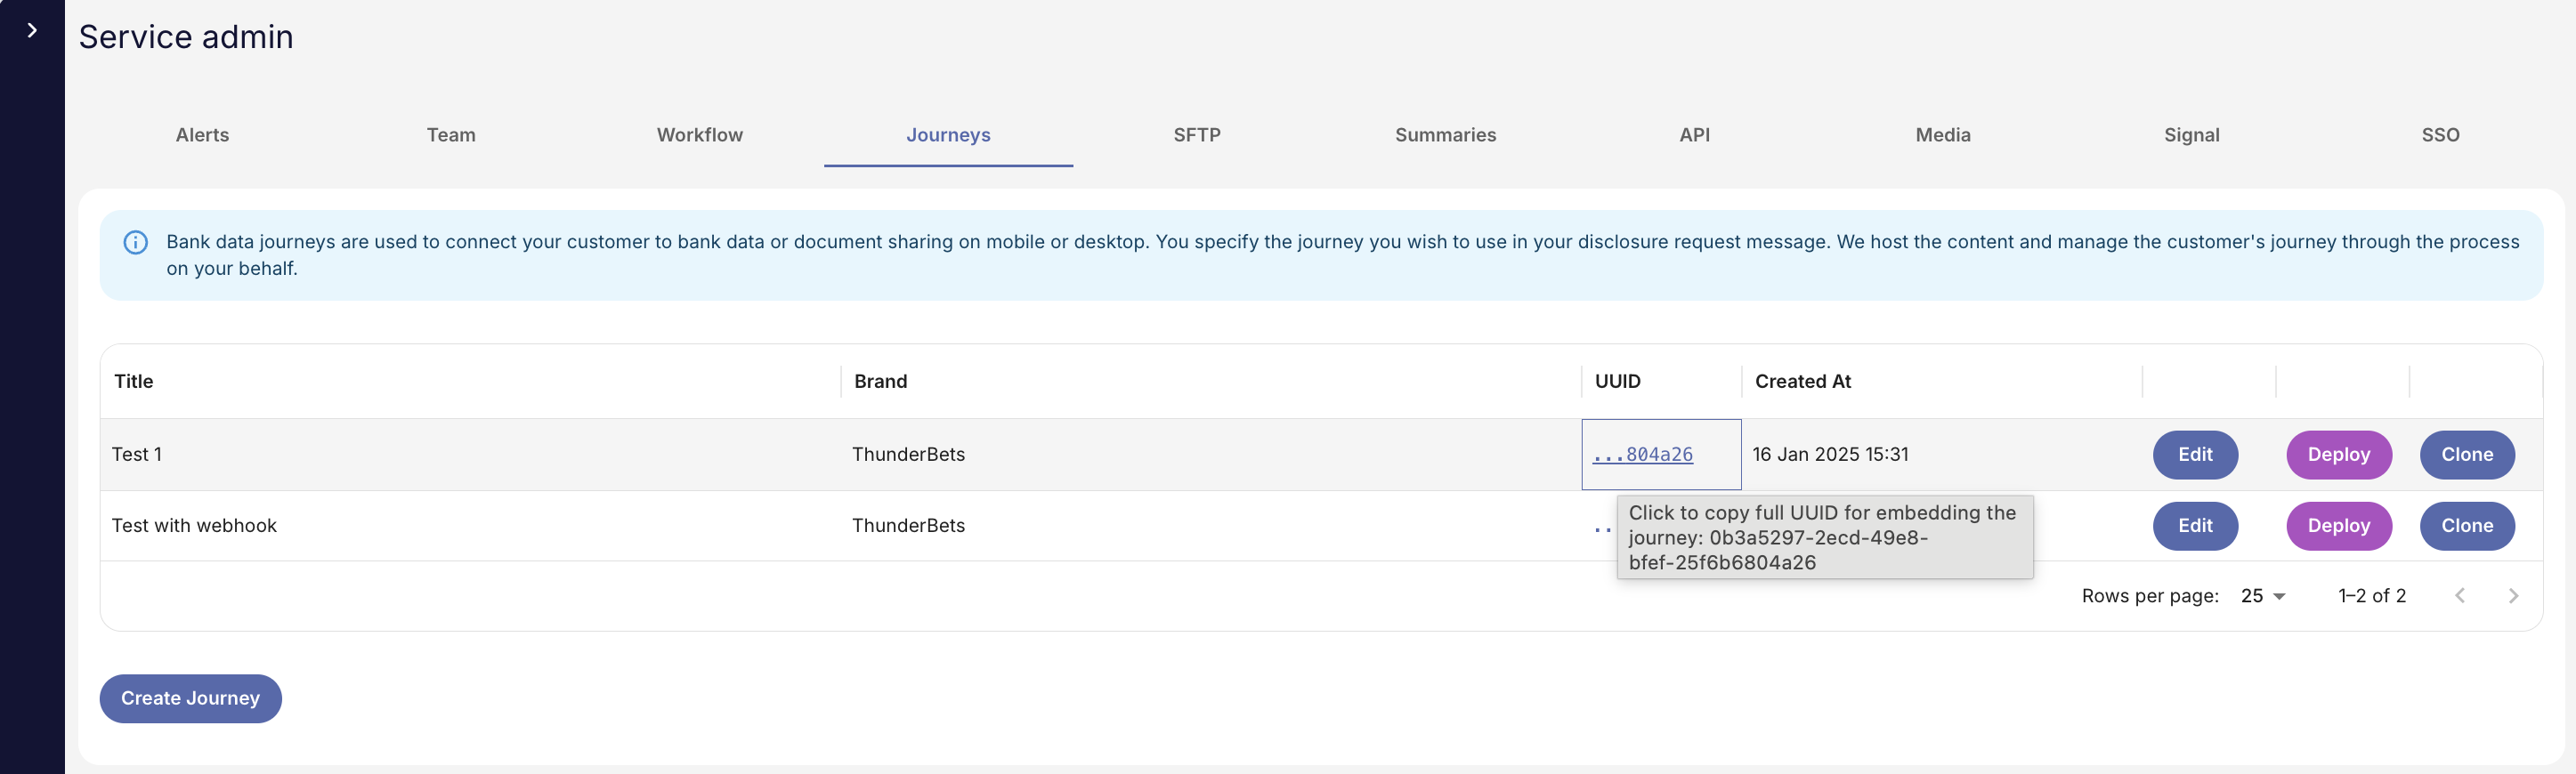
src=”https://dotrust.co/embeddedJourney/_journey_uuid"></script> The journey UUID is available in the list of Journeys in the Journeys tab:
Finally, you’ll need to embed the DIV tag where you want to display the content.
There are three modes:
-
inline: renders an iFrame
-
button: renders a button which launches an iFrame in a modal
-
hidden: awaits an event from your page to launch the modal
Here is an example DIV tag for Confirmation of Account:
<div
    data-dotrust-journey
    data-customer-id="YOUR_CUSTOMER_ID"
    data-income-disclosure-level="0"
    data-gambling-disclosure-level="0"
    data-general-disclosure-level="0"
    data-days="0"
    data-end-date=""
    data-mode="inline"
    data-width="100%"
data-height="600px"></div> -
Customer ID: this is your UUID for your customer which must be immutable.
-
Disclosure levels define the amount of data you have access from the bank account. The customer explicitly consents to this level of sharing when progressing with the bank account. They can change the sharing levels later in the interface without having to go back to the bank itself.
-
0 = no data (e.g. income: 0 means you can’t see payments from employers)
-
1 = summary (e.g. totals, averages but not individual payments or sources)
-
2 = detail (up to and including transaction level data)
-
-
Days must be between 1 and 365. This is the number of days of bank data you are asking for access to. For example, 90 = 90 days of data
-
Specify a negative number and leave ‘end date’ empty to get X days ‘rolling’ data which constantly refreshes.
-
Specify an end date and a negative number to capture a fixed period of time up to that date.
-
-
Set width and height to your design preference.
Once implemented correctly, and assuming you are in the correct domain, you will see the bank connection screen rendered with your text, theme and layout as specified in the journey definition console.
